


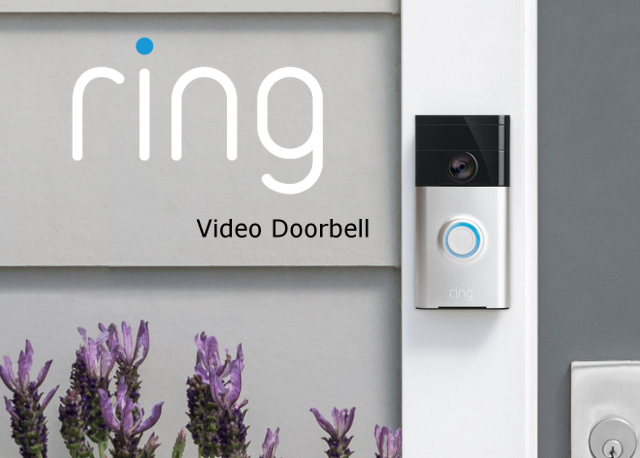
Answer your door from anywhere. Ring video doorbell allows you to instantly answer your doorbell and get alerts when visitors press your doorbell or trigger the built-in motion sensors. Using the Ring app you can see, hear and speak to guests from your smartphone, tablet or PC.
The team over at Ring offers many different models of doorbell. They have the new video doorbell 2, Video Doorbell Pro, Video Doorbell, and the Video Doorbell Elite 1080 flush mounted version with power over ethernet.
Ring also offers some security cameras and accessories to pair with your doorbell of choice.
Ring is the invention of Jamie Siminoff, as he set out to reinvent the doorbell. That he has, as its created a whole new category. They are based in Santa Monica, California. Their mission, as a company, to reduce crime in our communities. I think that is something we can all rally behind isn’t it? Offering a range of video products, they will definitely extend the monitoring of our doorsteps and houses.
Ring Video Doorbell – Review
In this review I will be going through the Video Doorbell. Which I believe is their biggest seller and initial product offering. They were one of the first and have done a lot to create a whole new class of doorbell.
The Ring video doorbell has a lot of features to arm your entry way.
- Motion sensor
- 720HD video Camera
- 2 way talk through Ring app
- configurable motion zones
- Infrared night vision
- lifetime purchase protection
In this review, I will go through the Ring video doorbelll, whats included in the box, the installation, the setup, the overall performance and ease of use. I will explore how easy it is to configure and make it a seamless part of my smart home.


Ring – Installation
Installing the Ring Video Doorbell was fairly straightforward. Ring includes a lot of help in the box. There is a drill bit for the included wall anchors, a handle and a dual bit that has a philips and a small torx end for use with

mounting the Ring. There is also a level that snaps into the mounting plate to make it easier to align it during installation.
The first step in the installation process is to charge your Ring Video Doorbell. In the quick start guide this is part of the getting ready for setup.
The Ring video doorbell can work with our without a wired doorbell connection. If you do not have a wired doorbell, you can use the ring as is. You will have to charge it from time to time. There is a note stating it will last 6 to 12 months. Although if you do get a lot of visitors and motion events, it may drain faster.
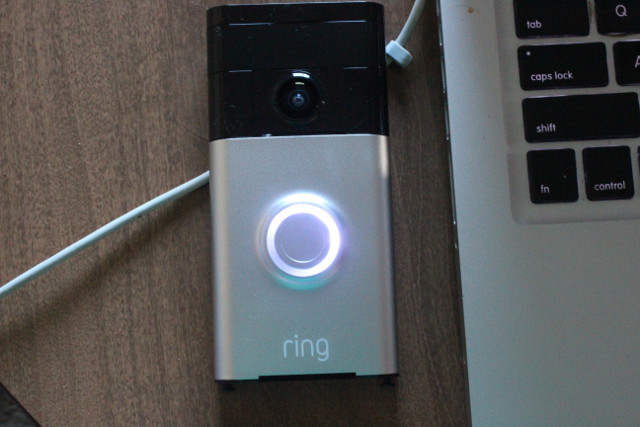
The light around the button of the Ring Video Doorbell indicates its charge level. I took a chance and when it was over halfway I unhooked it and started the setup.
Having a hardwired doorbell, I was pretty sure it could finish charging later. Once I had it on its base hanging on the porch.
Setting up the Ring Video Doorbell was really easy. The folks at Ring did a great job with their app. Once you download it, it walks you right through the process.
The first part of the app setup is the account creation. The Ring app walks you right through that part. Once your create an account, the Ring app asks you to choose a product to install.
I chose the Ring Video Doorbell. The app even does a good job of offering suggested names when you are prompted to name the doorbell. Of course, I chose Front Door. Sometimes when you get creative with the names it comes back to haunt you when you have to ask alexa to interact with it. The app also asks for your location.
Once you configure your location the setup starts. The setup is easy to initiate as its done with the press of an orange button on the back. This causes the Ring Video Doorbell to enter setup mode and be ready to pair with your phone.
 The Ring app does a great job of connecting your phone to the doorbell and displaying wireless networks that are available. Once you enter in the password and connect. The Ring app quickly returns your phone to the network you were on before.
I do appreciate it when the mobile app takes some of the work out of the process for you. The ability to automate the network configuration will help many users easily install the Ring.
It was cool to be able to configure the Ring Video Doorbell while you have it in your hand. Running off its internal battery, you have easy access to the setup button and the doorbell button for testing.
Once you get the Ring Video Doorbell on the network, the ring turns blue and you are ready to go. On to the mounting plate!
The Ring mounting plate does not have screw holes that line up with traditional doorbell mounting holes. The mounting plate is secured to the wall with 4 screws, one in each corner. I couldn’t find a way to get them to line up so that I didn’t have to drill new holes.
As I mentioned above, there is a small little level that snaps into the mounting plate. It makes it easy to make sure its level when you are marking the spots drill for screws.
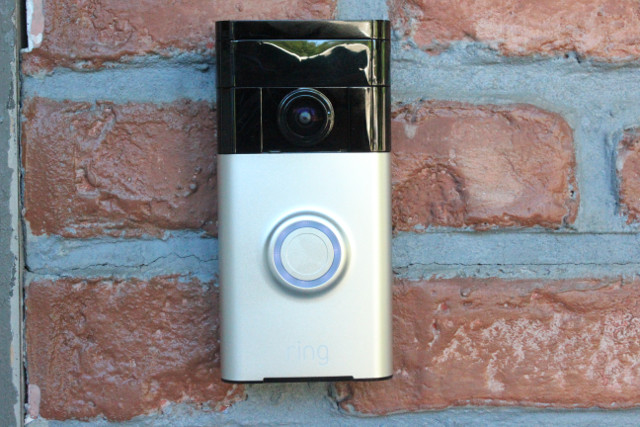
Once you attach the wires and secure the mounting plate, its easy to slide the Ring Video Doorbell onto the backing plate. it is secured in place with two set screws on the bottom that lock it onto the backing plate.
Take a look at the images below. I have added enough to walk you though the process I went through and allow you to see what it takes to setup and install the Ring Video Doorbell.
The Ring Video Doorbell is now mounted and functioning. I have setup my account and all is working. On the next page I will go through the Ring mobile app. I will take you through the features and configurations that are available. I will also let you know just how well they worked for me. With no further a deu on to the next page.
The Ring Video Doorbell is a great product to help make your home smarter. The team at Ring has done a good job at adding support for key partners. You will find support for Amazon Echo, Samsung Smartthings, Wink Hub, ADT security and many more. If you do not see your product listed on their website, I would suggest a quick google. You will probably be surprised.
Ring also has support for two power house integration apps out there. IFTTT and Stringify both support Ring and getting it more integrated with your home automation system.
I was very excited with support for the Wink hub listed on the Ring website. After the initial setup, I made sure everything was working then connected the Ring Video Doorbell to my Wink hub 2.
The process was simple. On the device page in the Ring app, I selected Ring+ partners. Then clicked the

Wink icon. I followed a few prompts, entered my Wink account information and had them connected in a couple minutes.
What can I gain by integrating it into my home automation system? The ability to use the Ring Video Doorbell to trigger events. I can use the motion sensor, a button press, or the low battery alert to cause other events to occur.
You can setup a Wink robot to turn a light on for you if motion is detected by the Ring Doorbell. You could also have the front door checked and made sure its locked.
I use the Ring Video doorbell to trigger my Arlo camera that watches the porch. To make sure it records when the Ring detects motion.
A Wink Robot will turn on the dinning room lights during evening hours if motion is detected. This way we walk into a well lit house.
Once integrated with the Wink hub 2 I did have to manage the alerts, or else I would receive two for each event. Having these two devices connected allows me to answer the door with the Ring app, then if I need to I can unlock my Schalge lock and allow the visitor in.
There are lots of uses for the Ring Video Doorbell to be part of your smart home automation. I do want to repeat again. In order to integrate Ring products into your smart home system, you do need to subscribe to the Ring+ service. Thats a big deal for some users.
[sam_pro id=1_26 codes=”true”]As I was using the 30 day trial, when it ended, all of my smart home connections dropped. When I renewed the Ring+ service for further testing, I had to reconnect them.
Ring has also declared that it will add support for the Amazon Echo Show to all of its products. This will allow you to see who is at your door using the Echo Show. Its as simple as enabling the Alexa skill for Ring.
It really is becoming a great automation landscape as different partners are releasing products with features that create a seamless system.
As with each section, I like to include screen shots so you will have an idea of how the mobile application is put together and organized. You can see below the process involved in connecting a smart home device to the Ring+ system.
These screen shots depict the process for adding the Ring Video Doorbell to my Wink 2 hub.
 I hope this page provides an accurate view for you to see the possibilities the Ring Video Doorbell can bring to your smart home. It has a good feature set and a well designed application to go along with it.
There is a large amount of support for integrating it into your overall smart home.
Don’t stop here, on the next page I will summarize the Ring Video door bell and wrap up the review.


