


I’ve been excited about the Aurora by Nanoleaf since I first saw a demo and shot a video at CES in 2016 – that’s about 23 months ago. Since then we’ve posted some updates, such as when they started shipping earlier this year.
Finally, this summer Nanoleaf (after much pleading, etc.) shipped me a starter kit to review. The Aurora starter kit consists of 9 of the triangular color panels a controller which supported at the time Apple HomeKit – it now also supports Alexa. The kit also includes some necessary accessories, that you need to mount it to your wall, and get it working. And of course there’s the Nanoleaf App to download.

Now that I have an Aurora mounted to a wall in my living room, I’m downright loving it.
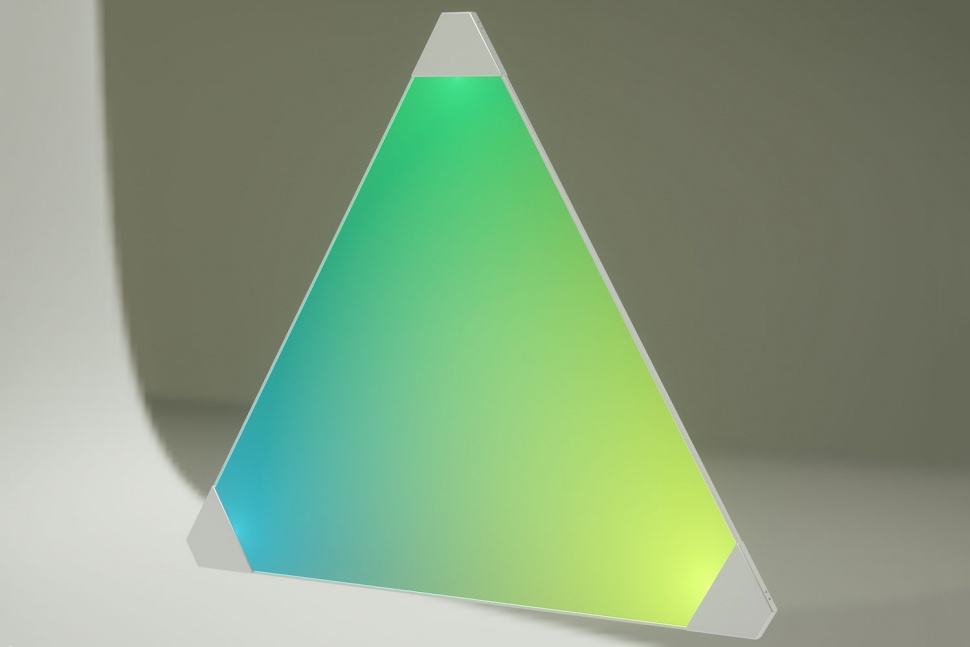
Nanoleaf Aurora Overview


In addition there are some options available. When I got in my shipment, the Aurora could do lots of things, but changing lighting to music was not one of those. Since the summer, Nanoleaf now offers Rhythm, which adds that capability. As I still don’t have one at the time of this writing, we’ll do the review without having tested that optional ability. If you, like me have the original starter kit, you can buy the Rhythm module for an extra $49.
Starter kits with Rhythm pricing seems to vary, with stage prices on Amazon at this time (over $300, which makes it cheaper to buy the regular starter kit and add the Rhythm module, assuming Nanoleaf doesn’t kill off the standard version.
These seemingly high prices this fall (2017) may be because of shortages, or newness, so prices may settle down.
The other, and probably far more important accessory for most Aurora owners is the expansion kit, consisting of three additional triangular panels and, of course, the necessary accessories.
Those three panel expansion kits street price online normally at $59.95.
The Aurora controller supports up to 30 panels. Want a really huge display, you’ll just need additional controllers, although I don’t think you can control more than 30 as a single installation and single patterns.
Installing the Aurora in our “Dream Home” – Twice!
Do to the almost ongoing remodeling in our “dream home” aka our smart home project, aka the house Lori and I live in, it took some time before we were able to install the Aurora on our back wall – between our two sets of bi-fold doors leading to our back patio. That same wall has a motorized projection screen. 95+% of the time, if we’re home, and not sleeping, the Aurora is doing its thing, following one pattern or another from the almost infinite choices. The other less than 5%, the screen is down and we’re watching some sports, news, or general HDTV. Primarily we view “TV” and movies in our home theater or Lori’s own media room.
The Aurora was finally live in August, but not for long. After enjoying it for perhaps 2 months, it was time to paint the living room, so down they came. I hoped to put them back up in early November after the painting, but after much consulting with Lori, we agreed that we wanted more than the nine panels that came with the starter kit.
I rushed online only to find that Amazon, and, well everyone, it seemed was out of stock on the expansion kits. No problem, I figured, I have contacts at Nanoleaf, I’ll reach out to them. They were great, but told me basically that there simply weren’t any available, which I took to mean that the Aurora was selling so well, that Nanoleaf needed every panel they could produce, just to do the starter kits.
The good news was that Nanoleaf said that within 2 weeks, there would be expansion kits in stock again. So, I ordered two.
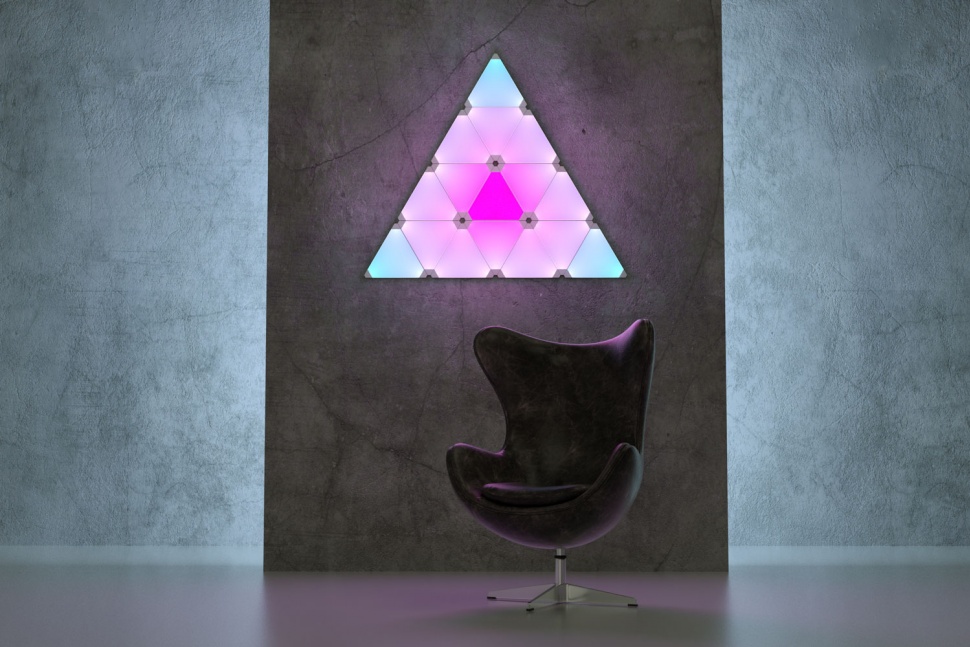
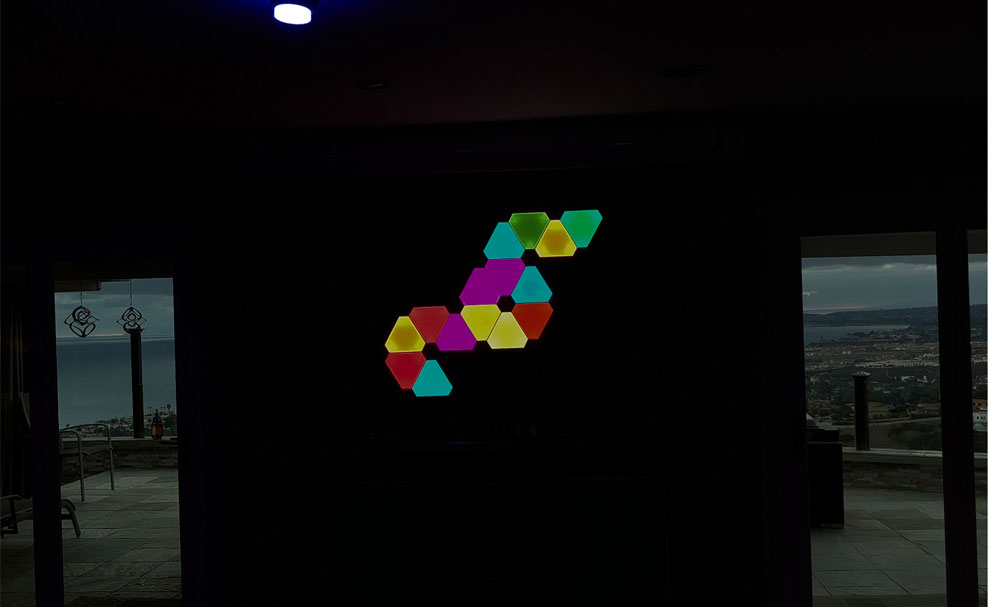
That gave me 15 total panels to work with. Well there’s a lot more combinations possible with 15 than with nine, so, we started trying out different configurations on our dining room table. We agreed (Lori’s idea though), that we wanted to go with something asymmetrical (the original configuration we created was symmetrical, most friends thought it looked like the Wonder Woman emblem or maybe Batman – you can judge yourself from the videos we shot and included.
Two weeks or so after the panels arrived our handyman was back in town, so just last week, he installed our new configuration on the wall – same location. My wife in particular really likes the new look. Me, I think I sort of miss the Wonder Woman-esque pattern. But I do like the new one too. If I have a complaint it’s that with all those adhesive tabs, there’s no really easy way to just change the physical layout easily. It would be great if they held to each other securely with only one or two panels being physically mounted to the wall.
Speaking of which, you’ll see some general images showing the aurora part on a ceiling, part on the wall. Just a note, there’s an adapter for screwing in the panels into the ceiling. Those adhesive tabs aren’t enough, apparently to hold the panels to the ceiling. It’s that pesky gravity thing!
Next page: Setting up the Aurora, and a close look at the Nanoleaf (Aurora) App.
App and Installation
Nanoleaf Aurora – Unique Smart Lighting and Wall Art: Nanoleaf App, Images and video clips of Aurora in action, Installation
Overall, I’m pleased with the Nanoleaf App. If there’s one challenge it’s figuring out which color palettes and settings to go with – for now! The combinations of color palettes, speed, brightness and types motion patterns, as I think I already wrote, are pretty much infinite. And let’s not forget that you can create your own palettes from scratch or modify existing ones.
The easiest way to present the Nanoleaf App that controls the Aurora, is to use our photo player, and provide notes in the caption area. So let’s take a close look!


I took screen shots of a great menu of the menus, so that this section gives you a good idea of all the available controls. Most menus have brief captions to provide some useful hints and info.
Still, there’s nothing like setting it up, and starting to experiment. I’d say it took me about 20 minutes of just “messing around” to get a decent idea of the basic capabilities, and a couple hours more of exploring to get a feel for much of what is possible. The capabilities are extensive, and, as mentioned, you can use those provided, create your own scenes, or download additional ones from the Discover tab at the bottom of the menus.
From much of my playing around, and experimenting, here are some hopefully useful thoughts:
Even in our living room, very bright in the daytime from lots of glass doors and windows, I rarely set the overall brightness above 70 – 80 percent. In the evenings, we switch to color lighting in the room, with a mix of colors around the waterfall in the middle of the room. Other than that, the chandelier over our dining room table in the room is set to a pretty low level of white (After dinner, of course), and the one light we have on a painting on the opposite wall, also runs dimmed a good bit. This lets color dominate.
Generally at these times, the Aurora is dimmed to 30-50% brightness, since the overall lighting in the room is low. The Aurora becomes one of the central focuses of our color lighting (of course). At night I’m more likely to move away from Random, to patterns like Flow, or Wheel. Still, we do run Random a good bit, but normally 40 % brightness or lower in the evening.
One nice feature (you can spot it in one of the menus, is that if you have schedules set up, you can play around with new patterns, but quickly click to return to the normal schedule.
So far, I’ve used Siri – iPhone to turn the Aurora on and off, and to dim it. I’m still playing with the controls to figure out how to change scenes by voice control.
OK, you can scan the menus below. I suggest clicking on the enlarge icon in the upper right of one of them, to get into the larger image mode. The captions will still be there, and you can still move from one to the next using the thumbnails, or the left and right arrows to the sides of the images.
Installation of the Nanoleaf Aurora


Let’s start with what’s inside the Nanoleaf Aurora Starter Kit:
- 9 Aurora Panels
- 1 Aurora Controller
- with power supply/brick
- 9 connectors (called Linkers)
- 28 tape strips
- 9 triangular pieces of waxed type paper used as panel separators in box
- can be used to create design layouts
Optionally you can buy more panels, more accessories, including regular or Flex Linkers, adhesive tape, and ceiling mounting accessory to hold the panels to the ceiling. Apparently the adhesive tape isn’t quite up to holding them to the ceiling. It’s that pesky gravity.
What else is needed to install your new Aurora?
- Wi-Fi network
- Smartphone or tablet that can run iOS (Apple) or Android App
- Download the appropriate App
- AC power
- A large enough surface – or surfaces to place the Aurora layout you go with
- A level – or other way of making sure you mount the panels perfectly lined up horizontally or vertically (assuming, you want it that way – most will)
Unboxing:
Nothing to it. Open box, remove everything
Designing your Aurora layout
I found the easiest way to come up with my final layout designs are three-fold
A. You can look on the Nanoleaf site, or online to see many of the nine panel configurations and choose one. But, if you buy extra panels, the combination possibilities increase exponentially, and few examples are out there, so:
B. Create layouts on a table top or on the floor. Power them up, power them down, change the configuration, power up… and repeat until you have narrowed your choices, and then finally get it down to just one.
C. There’s a Layout Assistant option in the Settings menu on the Nanoleaf App. One can select the number of panels, and it will draw you a pattern using that number. After that, one can change the number of panels, as you can see from the images below, I changed from 9 to 15. With a finger, I can drag any panel to any other location, which is how I got from one 15 panel layout to the other in the screen shots below. Easy.
Ultimately, using C – the app, is fast, but I really liked laying them out table top, so I could provide power and get a good feel what various scenes, and options would look like.
In our doing our current 15 panel Aurora design, we started with Lori’s idea that she wanted something asymmetrical (our original 9 panels were definitely symmetrical).
From there I “studied the height and width of my space, concluded that I wanted the layout to be at least 40 inches wide, and at least 30 inches vertically, to fill the space, and look well balanced in that space. I also decided that having a 6 sided circle, would look good. Finally due to the location of the AC power we wanted to use (on the right up by the ceiling, I wanted the highest part to be on the right side.
Working from that, I played with all kinds of layouts. I quickly discovered that I didn’t want any really long horizontal or vertical line of panels. For example 8 in a row. Turns out the final configuration was no wider than 4 panels horizontally, and 6 panels on a diagonal.
Figuring out the bottom few panels – which way to turn them, was where the final decisions came in.
Ultimately I ended up with seven designs, although much of them were the same.
On a table top it takes only moments to set up all the panels, plug in and fire them up.
And it takes only moments more to power down, remove some panels and connectors (Linkers), to modify the pattern and power up again.
After less than 10 minutes of consulting with Lori, we had our final configuration.
With the design settled, now it was time to mount them to the wall.
Which in my case, means calling in the professional, DaVoy, our friend and handy person.
Just as he installed our earlier configuration, he tackled putting these up with enthusiasm. (Too much, perhaps – I caught him near the end, not following my pattern, but then that’s why I was there. No harm, no foul, only minutes lost, and we weren’t in any hurry.
Most importantly, DaVoy made sure those first four panels on the top right where level. As long as that run is level, everything else connected below would be too. (Getting something perfectly level is exactly the kind of thing I have little patience for, so prefer to bring in a pro like DaVoy!)
I’m not sure how long it took him from start to finish, putting up the 15 panel configuration, but I am sure it was less than 40 minutes, possibly less than 30.
When it was done, we fired up the power, fired up the App, and everything worked. Now that’s what all smart products are supposed to do when you fire them up – work as advertised – if only that was true. After that, he spent a few more minutes neatening up the power cord, so a minimal amount would show on the wall. On his next trip by, he’ll paint the nicely thin power cord (low voltage) between the controller and the power brick, using our wall paint. With less than a foot showing, most people won’t even notice.
That pretty much was it. I already was running the app from the original installation, but if you are doing your first install, you’ll have downloaded that app, and install it. Once the app finds your Aurora you are ready to start playing around. enjoy!
Summary, Pros and Cons
NanoLeaf Aurora Lighting and Wall Art – Summary, Pros and Cons
The Nanoleaf Aurora, is fun, it’s colorful, its pretty y energy efficient, and it can light up a room. But Aurora is very different than the many other smart color lighting we have reviewed, because it is the first smart color lighting system we have found to review, that is primarily art, not lighting. In our own home, we named our Aurora setup for purposes of Apple HomeKit and Alexa – choosing simply to call it: Wall Art. So around here, you would hear, occasionally, statements like: “Hey Siri, dim Wall Art to 40 percent”

All told our Aurora has been live on our living room wall for about three months, more than two of that in our original 9 panel configuration, and the rest in our new, non-symmetrical 15 panel configuration. Neither my wife or I have gotten tired of it. Now, mind you, Lori isn’t the big fan of color lighting that I am. She’s more of a take it or leave it type when it comes to my lighting. Just the other day we replaced three lights in our stairway ceiling with color lighting. I had soft blue-green and blue-magenta set on them to light up a staircase wall. When I asked her what she thought, it was a typical “it’s OK.” (Alas!)
But she really does like the Aurora. She favors dynamic color changing, with most of the lights doing different colors (using Random), at any moment. I’ve showed her some of the more subtle ones, and while she likes Wheel, and a bit of Flow, mostly she likes that Random with nice dynamically changing colors. Not too slowly either. Me, I agree with her favorites, but I also really like Wheel, and I like to run various scenes at very slow speeds as well, where at a glance, you won’t notice colors changing, but look back a minute later and notice that the display is now a bit different color wise.

One nice thing is that Aurora is very energy efficient. The panels draw a maximum of 2 watts (per Nanoleaf, we did not measure), but to draw 2 watts, they need to be doing white at full brightness. Since most of the time each panel is doing one or two colors, and rarely at 100%, it’s likely that most of the time an Aurora is using anywhere from 1/4 to 1 watt of power per panel. Think this way, let’s say one panel is doing pure red at 50%. Red at most draws 1/3 of the 2 watts, so at 50% that’s about .7 watts. Multiply that by 9 for a basic array, and toss in say 1 watt for the controller (a guess), and we’re talking about less than 8 watts draw.
Late at night we use Aurora as a low cost light changing system to provide low lighting for our great room, that probably looks from outside our gate, like a TV running as the colors are always changing. That’s probably better than a single security light that’s on, but never changes. Late at night our Auora runs a pattern that is based on 20% overall brightness, so even with all 15 panels running, I figure I have one super fancy, “night light” that is drawing less than four watts. Now that’s an affordable enough for a night light, that’s pretty cool.
The biggest problem with the Aurora is the same one for any home automation gear – maintaining communications. That back wall that houses our Aurora is as far away from our router as any device in our home, and where our Wifi is weakest. If our downstairs power line booster looses contact with the router, bingo, getting a response from the Aurora can be a problem. Fortunately this is not the Aurora’s fault. I know when that happens that all I have to do is unplug and replug in my power line Wi-Fi extender, and in 30 seconds Aurora is reachable again.
Meantime, even if the Aurora isn’t reachable by Wi-Fi, it will still continue to run whatever scenes it was last set to run.
Remember, rock solid Wi-Fi, is the most important thing to have in a smart home / home automation system – if you want minimum aggravation and downtime. No doubt Wi-fi will eventually standardize on a “mesh” design, where each new device added beefs up the network, not weakens it, but until then, keep that Wi-Fi working.
Unless you are a programming fanatic, determined to design your own, let’s just say that learning to use the app is straight forward, and getting a good handle on most of what it can get the Aurora do do, shouldn’t take more than 15 – 30 minutes to get a handle on, once it is live. Fiddling around coming up with new combinations, and patterns from all the existing options is easy, and takes seconds or a minute to try new ideas out. If you want to start your own patterns, you can invest a good bit more time, but most of us won’t have to. Your biggest chunk of learning time will be exploring – learning how much variety and capability Aurora has, and pairing that with what you think you’ll like the best.
In other words, its fun playing with Aurora, and coming up with scenes you really like. It’s what we all need – a fast, easy, satisfying hobby.
Aurora – The Conversation Piece
Aurora sure is that. Our house is tricked out with a lot of color lights, a small ceiling to floor waterfall, a cool looking Chandelier, and some other goodies, but only the waterfall, it seems garners anywhere near as much interest as the Nanoleaf Aurora does. Just about everyone who comes by, whether friends, contractors, or even business related – product managers (from the many companies who’s products I review), is curious about the Aurora. I know of one of those who has since bought one, and a couple of others threatening to.
Because it’s fun!
Not only many ways to control the colors, but let’s not forget, you can go with static displays – determine what color you want each panel to be, and have them stay that way. So, at our hose, where teal blue greens are some of our favorite colors, there are times when I’ll have most of the living room lights set to blue green, including the Aurora.
What you do with Aurora, is pretty much up to you. Create different scenes, set schedules, change your life with color lighting!
Except, if you are a music lover, and want the Aurora to dance with the music. for that, as mentioned on the first page, you’ll need the newer Rhythm module.
I will be adding the Rhythm module sometime in the next few months, and will add an update to this review, on how that works.
Aurora Pros and Cons
Nanoleaf Aurora Pros:
- Much fun – enough color, speed and pattern capability, to keep it from being boring
- A lot more fun than the multi-faceted mirror it replaced on our wall
- Truly unique concept
- Although there are others creating changing light art, Aurora has to be considered the pioneer
- Very energy efficient – max draw of 2 watts per panel, and typically less than one watt.
- Set schedules – turn on, off, run different scenes at different times
- Change speed, patterns, “flow”, dynamics, and brightness
- Design your own effects – from scratch or modifying existing ones
- App is reliable, works well. Although it could be a bit more intuitive (heard that before?)
- Compatible with Apple HomeKit Siri
- More recently, compatibility added for Amazon Alexa and Google Assistant
- Warranty is a very respectable two years parts and labor – not bad for a $200-ish product!
- Good built in help section
- Ability to share settings with others (through iCloud) so they can also control the Aurora
- Single controller supports up to 30 panels at once
- Optional Rhythm module plugs in, allows music to control the lighting
- A spend of $200 to $300 buys a lot of capability – i.e. our 15 panel system cost less than $300
- Overall great value in smart contemporary wall art
- Still fun after months of use
Aurora Cons
- Scheduling capability sorely needs option to set times based on before/after Sunset and Sunrise, which saves folks a lot of resetting schedules at Sunset times change
- Lack of this feature, is noteworthy it its absence , as it is with other devices missing this Sunset/Sunrise scheduling feature – no excuse
- Missing ability to stack scenes – an interface that would allow easy creation of a series of scene designs, to start at different times would be a plus. It can be done one at a time, with “overlapping” schedules
- A design for interlocking that would make it practical to change the layout once on the wall, would be great
- At lower dimness levels, the lights tend to transition less smoothly (that makes sense due to the smaller color palette (mixing R,G, and B), but smoother is better
- It would be nice if Nanoleaf also sold add on panels in single quantity, not just 3 packs, and offered affordable kits of extra Linkers, adhesives, and Screw Mount, etc.
- Linkers only available in Flex not standard, and quantity of 9.
That folks, concludes our review of the Nanoleaf Aurora.
If you aren’t into color lighting, or creating your own “installation art”, then the Aurora may not be for, you, but most folks that have seen ours, think they are pretty cool, even if they don’t see using them in their own places.
Enjoy!
Art's been reviewing high tech products and editing their reviews for 15 years. He launched his first website presenting solutions.com (sold in 2003) in early 1995 when there were only a few thousand .coms. He launched ProjectorReviews.com in 2000, and started planning Smarterhomeautomation.com back in 2011.
Art's goal is to provide in-depth reviews on the latest and hottest products that fit into the Smart Home, aka Home Automation, as well as insightful articles to educate people into what's available, what makes the most sense, and where the market is going, so people can better plan, and implement their goals for energy efficient, convenient, and downright "cool" capabilities.
Ancient history: Born in Allentown PA, Graduated 1972. Sold and managed stereo stores (and did a little surfing) in the early, mid-70's before getting into computers and more AV. Managed the first computers store in Pa, starting in 1979 (not the first manager). Moved to selling computers to major accounts. Then moved west to SF area, for a four year stint with Epson starting in 1982, then left for one of the early large venture backed start-ups in the Silicon Valley - Presentation Technologies. Left there to start up Presenting Solutions, which became the first projector focused reseller on the internet (Jan 1995). Married Lori in 1990, and have been enjoying our daughter Lisa, since 1992! Presently living, and working in San Clemente, CA.


